Many windows users with multiple computers would like to use a home network, although many ultimately believe that home networks are in fact highly demanding and costly.
Common misconceptions about home networks are:
-networks take a lot of time to setup and are therefore not worth the hassle
-additional, costly, hardware is required for the network to run smoothly
-they require a lot of programming knowledge in order to use
-one must change a lot of settings in order to use it
Of course, these aren’t all false, and in some cases may be true. But for most cases the inbuilt functionality of being able to run a network is more than sufficient. Of course, in later posts we can delve into how to actually run a proper enterprise server, and how to do it efficiently if enough requests are made. Of course, anyone looking for that really needs to know what they are doing before starting.
Back to the track of Windows home groups. In essence, a Windows Homegroup is simply the ability to share files over the network, saving the hassle of using a USB port to copy over files, and most network routers/modems do not affect your Internet data usage.
Before you begin:
-make sure that you have multiple computers, a Homegroup is absolutely pointless without multiple computers that are found on the same Internet source.
-you can navigate your way through control panel and also have access to other computers.
-make sure that you have administrator privileges, if you continue without you may or may not be allowed to continue.
To begin:
Start up your computer as normal. You do not need to access your computer settings.
Type in your password as normal, and make sure that you are connected to the Internet, or at least your router, even if that doesn’t have Internet capabilities.
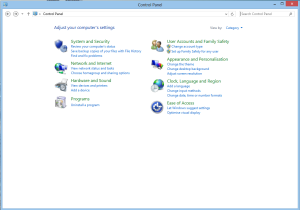
Navigate to your control panel. This can usually be found in the start menu on the right hand side.
For windows 8 users, please do not use the windows 8 metro settings, you must use the desktop control panel.
Make sure that you are viewing your control panel by category.
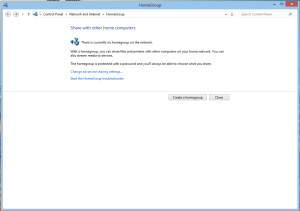
Click on network pane, and click on the home-group tab. A new screen will appear, and after a but of loading click on the create a Homegroup button below the text.
Navigate through the wizard, choosing what you want to share on the network, and view your password. Please note it down, but if you lose it, don’t worry. It can be found in the same Homegroup screen that we were in just a moment ago.
Note: If a user has already created a Homegroup on the network that you are on, you will not be allowed to create your own Homegroup. Instead, you will be asked to join this new Homegroup by inputting the password for that particular Homegroup.

